VIRTUAL LEARNING – E-FORUM – User Manual
TABLE OF CONTENTS
A. INTRODUCTION
B. VIRTUAL LEARNING: Professional Learning Community e-Forum
C. CREATE A COMMUNITY
D. CREATE A LESSON
E. STUDENT REGISTRATION/ENROLMENT
A. INTRODUCTION
- What is Virtual Learning?
- Virtual learning is a learning experience that is enhanced through utilizing computers and/or the internet both outside and inside the facilities of the educational organization.
- It is also known as e-learning, digital learning, hybrid learning, home-based learning, or other related terms.
- The instruction most commonly takes place in an online environment.
- The teaching activities are carried out online whereby the teacher and learners are physically separated (in terms of place, time, or both).
- Distance learning is conducted in a virtual learning environment with electronic study content designed for self-paced (asynchronous) or lives web-conferencing (synchronous) online teaching and tutoring.
(Ref: https://www.vedamo.com/knowledge/what-is-virtual-learning/)
2. What devices and tools to be used?
- Use any device from a smartphone (simple application such as WhatsApps, video calls, etc.) to laptops and tabs.
- Use innovative tools and strategies (using education applications such as Google Classroom, Google Meet, Zoom, Apple learning Centre, Edmodo, etc.) that can be applied in a smartphone, laptop, and other devices.
Strategy 1: Virtual learning – Professional Learning Community e-Forum (a simple interactive online /home-based learning)
Strategy 2: Digital Flipped Learning (comprehensive virtual learning platform based on Moodle application) – Refer to Digital Flipped Learning: User manual
Strategy 3: CIDS-VideoCorps (small group online communication tools) integrated into both strategies as a means of a virtual meeting.
-
- allows students-lecturer/teacher interaction in the invitational virtual learning session.
- capable of integrating links of the virtual learning activities to the lesson plan.
- Basic knowledge of ICT is required in implementing visual learning in school.
B. STRATEGY 1: VIRTUAL LEARNING – Professional Learning Community e-Forum – (Participation in an interactive e-forum Professional Learning Community via laptop or smartphone)
- Students may participate in a synchronous or asynchronous mode of interaction– (teacher-student interaction).
(Synchronous communication means that two or more people exchange information in real-time. Asynchronous communication refers to the exchange of data between two or more parties without the requirement for all the recipients to respond immediately)
- Features
- It is simple & practical features
- User may use a laptop or smartphone as a medium
- It is an interactive virtual forum platform
- Similar to the Facebook concept
- Able to insert text (for instructions), video clips from YouTube, audio, or images as a stimulus.
- Links to Google Classroom to access resources created and stored in the Google drive or the one drive (notes, assignments, etc.) and google search for accessing other external resources.
- It will enhance the lesson conducted and inspired learners
2. Application Procedures
(a) Login to CIDS – Login to CIDS – Login as usual to CIDS main page using the same CIDS ID
-
-
-
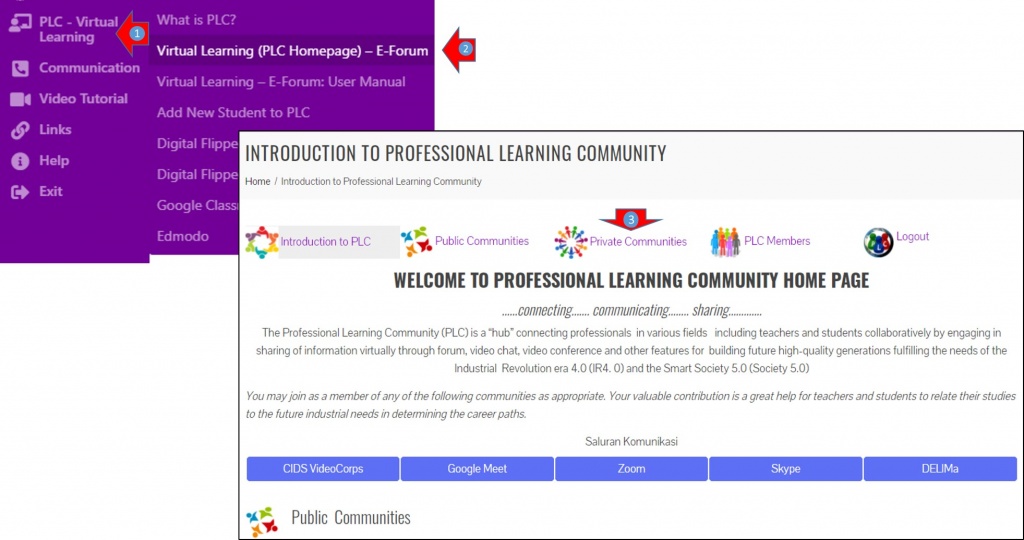
- Press Virtual Learning – PLC at the main menu
- Press Virtual Learning (Homepage) – E-Forum
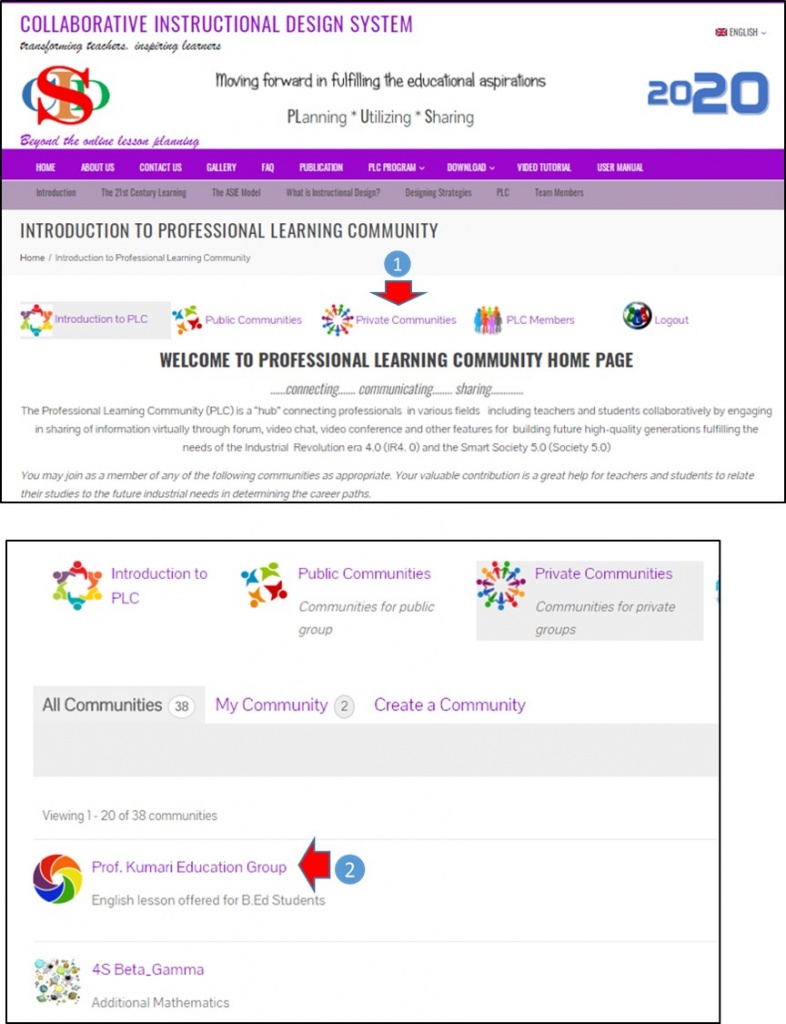
- Press Private Communities – to create private interaction room/site
-
-
The PLC Homepage will appear as below:
(b) Update your profile (recommended for the first time user)
-
-
-
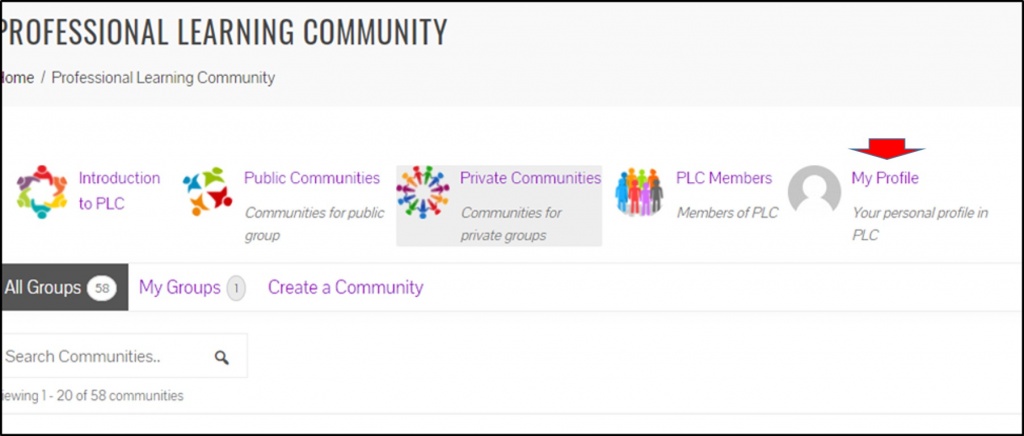
- Press My Profile
- Fill in the required information & press Save Changes at the bottom of the page.
-
-
-
-
-
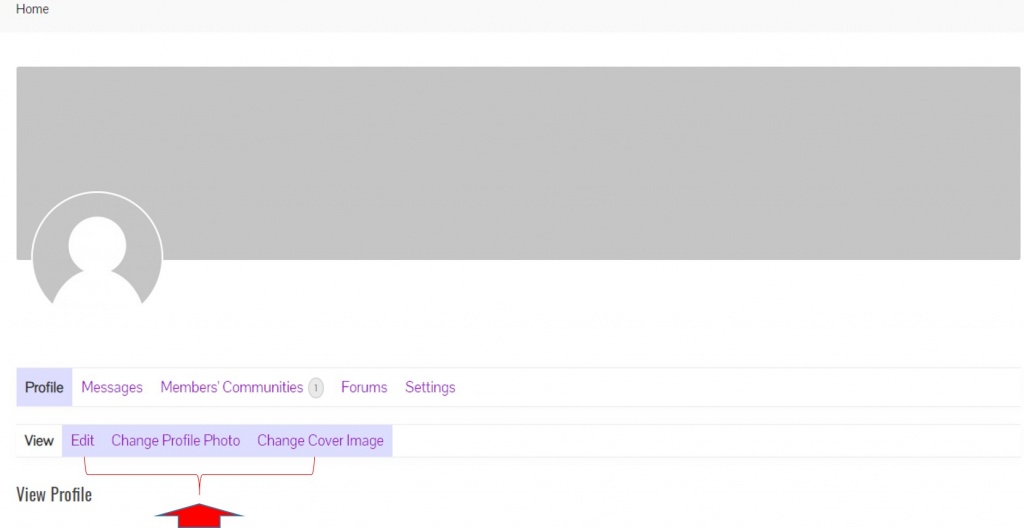
- Press Change Profile Photo – to insert your photo
- You may Select File to Upload Photo from your local drive
- Or press Take Photo to take a snapshot from your device.
- Press Capture and Save (for snapshot)
-
-
C. CREATE A COMMUNITY (for teachers to create a room for their teaching & learning group)
- It is recommended that the community group is created under the teacher’s name, not by subject or class.
- It will avoid too many communities being created.
- However, teachers are free to determine their ways of creating their community.
- Students will log into the e-Forum once the learning activities have been prepared by the teachers.
- Notifications can be made through schedules delivered at the beginning of the interaction, or through the teachers’ messages.
- It can also be notified via a group of what apps or by other methods.
- Procedures
-
- Press Create a Community
- Fill in the Details of the Community to be created
- Press Create Community and Continue to Photos (please follow the instructions)

-
-
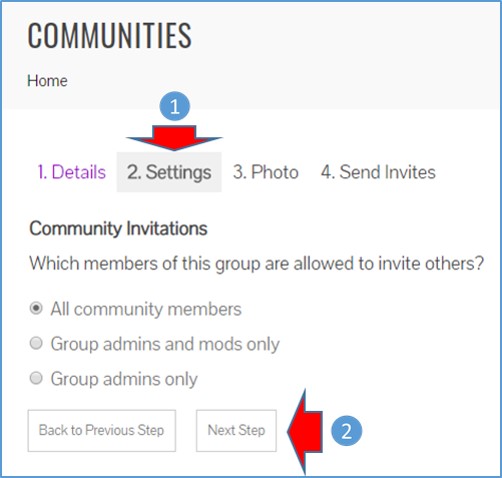
- Press Settings (keep the default setting)
- Press Next Step
-
-
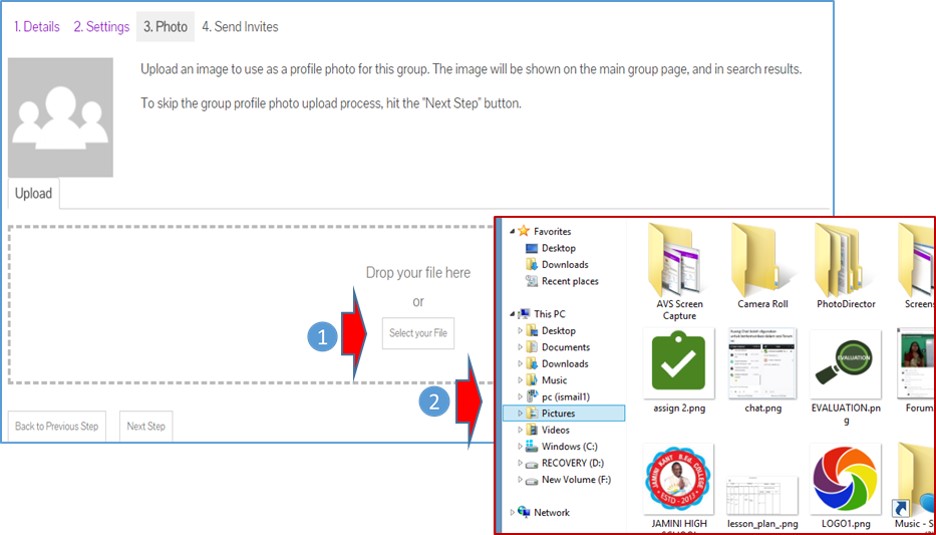
-
- Press Select your File
- Search & select the logo file from your folder (create a logo for your group)
-
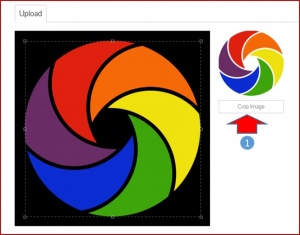
Resize (crop) the photo
- Press Crop Image to save the image
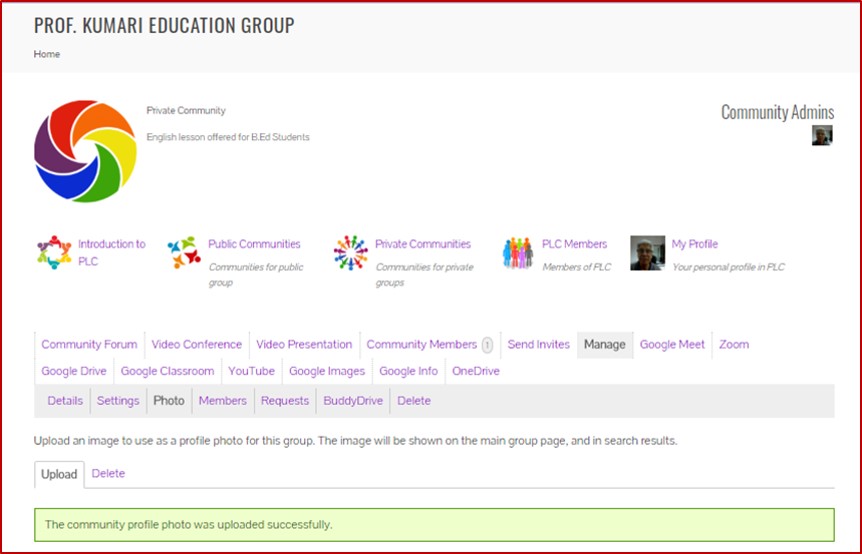
Your logo will appear on the screen. You can delete or replace the photo
D. CREATE A LESSON
- You can insert various materials in this e-forum (materials from Google Classroom – Google Doc, slides, etc.), video clips from YouTube, images, audio recordings from sound recorders, video recording from a smartphone or other devices, materials from Goggle Drive storage, One Drive, etc. depending on your skills and creativity.
- Learning will be interesting if the lecturer/teacher is creative enough to provide his materials to his students instead of just copying links from materials created by other teachers.
- You can use laptops or smartphones for this e-Forum Digital Learning.
Please take note that there are slight differences in application characteristics (application features) between laptops, i-pad, smartphones etc.(please explore).
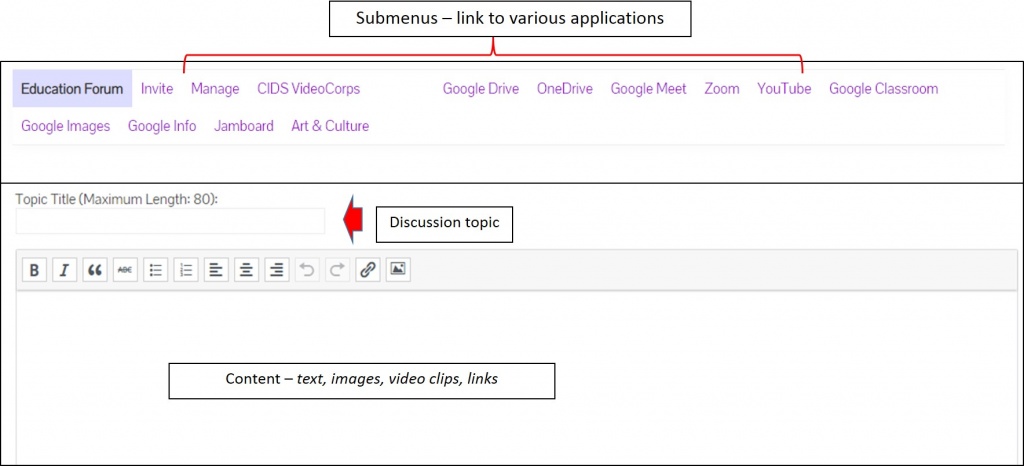
- Creation of contents in e-Forum
- There are submenus for various functions/links
The following items are recommended to be included in the content of the forum:
-
-
- Enter a Subject, Topic, Discussion topic, etc.
- Write in short – instructions/questions (what students need to do)
- Write a short introduction of the content and perhaps a few important points
- Insert link materials (One link per delivery) for further readings
- Examples: link from Google Drive, One Drive, Google Classroom, YouTube, Websites, etc.
- The file must be shareable for all.
-
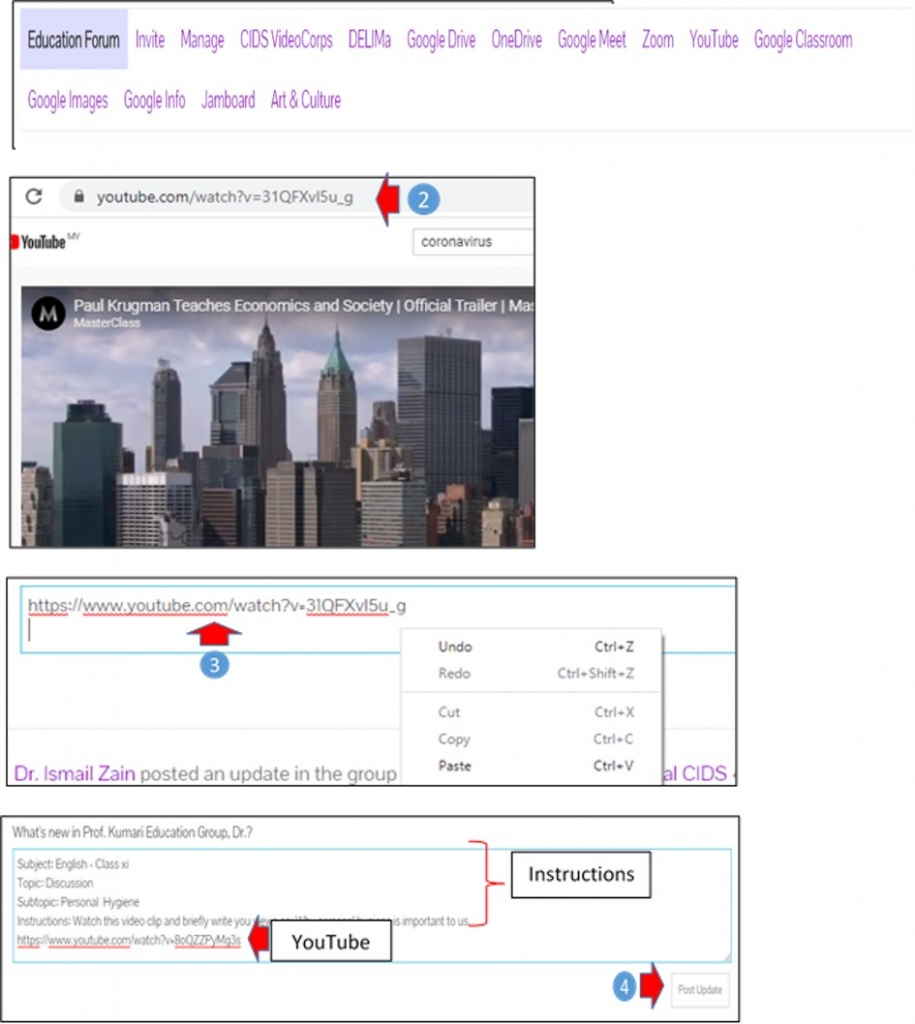
(a) Example 1: video link
Press on the YouTube menu button
-
-
-
-
- Find a Video Clip and copy the URL
- Return to the E-Forum and Paste URL
- Press Send/Post
-
-
-
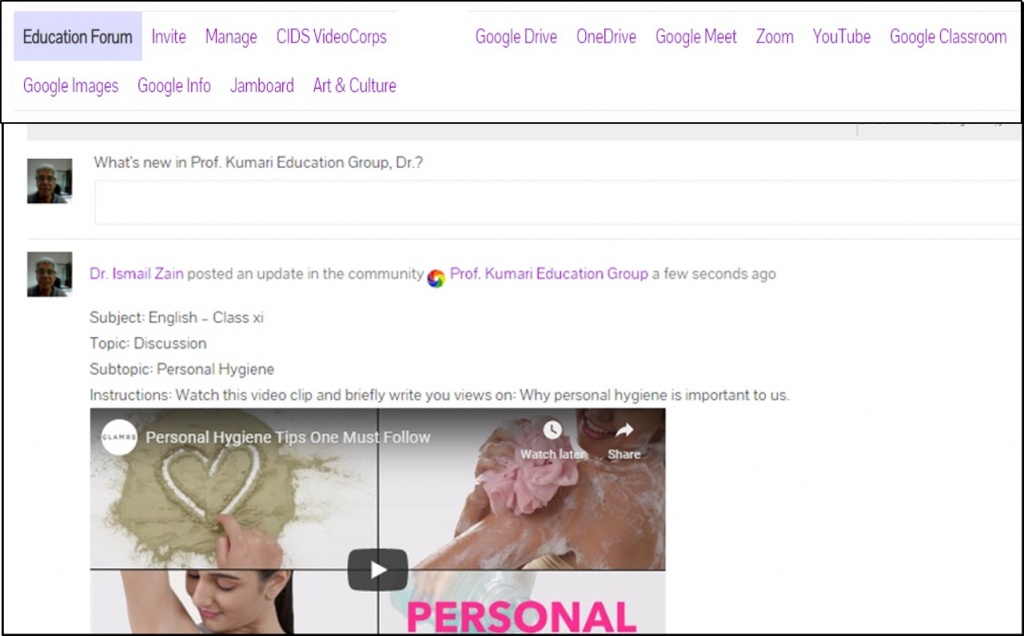
After press Post/Post Update – it will display as follows:
(b) Example: From Google Classroom
-
-
- Press on the relevant button (Example: Go to the Google Classroom page)
- Search for materials (stored in Google Drive)
- Copy file (make sure it has shared permissions for all)
- Paste in e-forum space
- Press Post
-
-
-
- You may find materials for other links – Google image, Google Info, Google Meet, etc.
- You may record audio – save it to Google drive or One Drive and then insert the link in the e-forum.
- You may do a video recording – upload it to YouTube and then copy the link to the e-forum.
- There is much more that can be done with your creativity to create strategies.
- The PLC-CIDS Digital Learning features are constantly updated to improve the learning process.
- There are also limitations (restrictions) on this application.
-
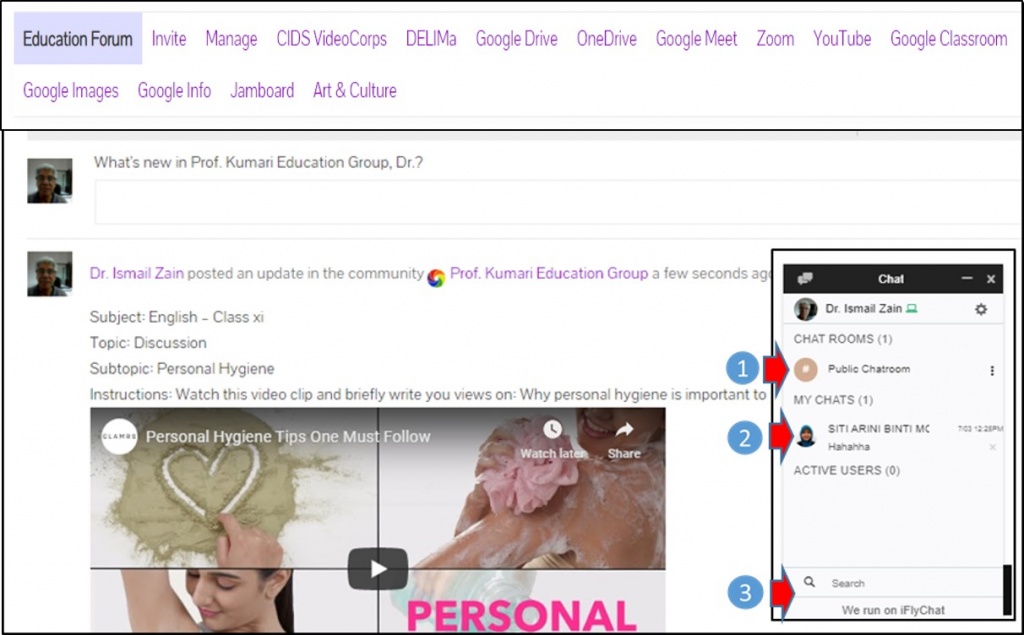
2. Chat Room
While you are in the e-Forum, the Chat room will appear at the bottom right-hand corner. Chat can be used as students’ informal discussion before writing in the e-forum.
-
-
- Press Public Chatroom to interact with everyone
- Or Press the specific name in the Public Chatroom to interact privately.
- You may send messages, attach files, and images
-
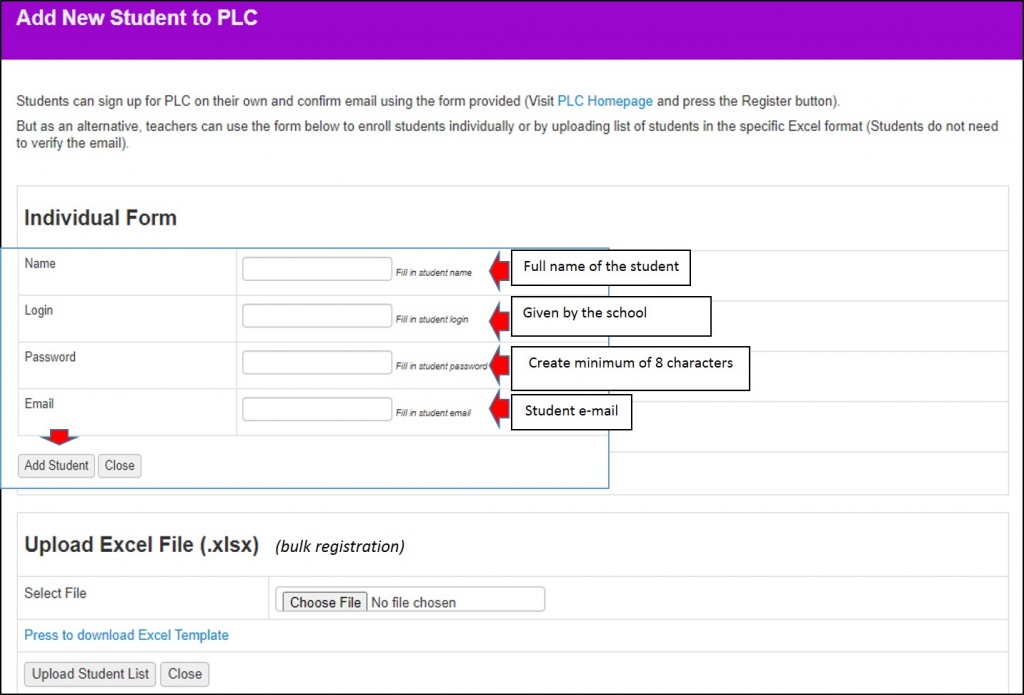
E. STUDENT REGISTRATION/ENROLMENT
-
- School teachers can register their students and the data can be used by other teachers to invite them to their respective e-Forum communities.
- Teachers should work together to determine the person who will register the student (an error message will appear if the student is registered twice).
- Register your student individually or in the group (bulk registration) – recommended
- Students may register by themselves.
- Enroll your student in the room/site.
To register your student:
-
- At the main CIDS website press Virtual Learning – PLC
- Press Virtual Learning: PLC- E-Forum or
- At the main menu of ASIE Model press Virtual Learning: PLC – E-Forum
- Press Add New Student
- Follow instructions
F. STUDENT PARTICIPATION
- Procedure 1: Login Virtual Learning PLC Homepage
-
- Browse https://bit.ly/3bchmTC
- Full Url https://asiemodel.net/introduction-to-professional-learning-community/
- Or use QR Code (for smartphone applications)
- A Welcome page of Professional Learning Community (PLC) is displayed as shown below:
2. Procedure 2: Login to Virtual Learning PLC – (E-Forum)
-
- Press Login on the main PLC page
- Enter Email & Password – given teacher (do not change Email and Password)
- Press Login
| Password: gcskm123456
|
| Emel: [email protected] |
| Example of e-mel & password |
| Example: Condition 1 |
3. Procedure 3: Update Profile
-
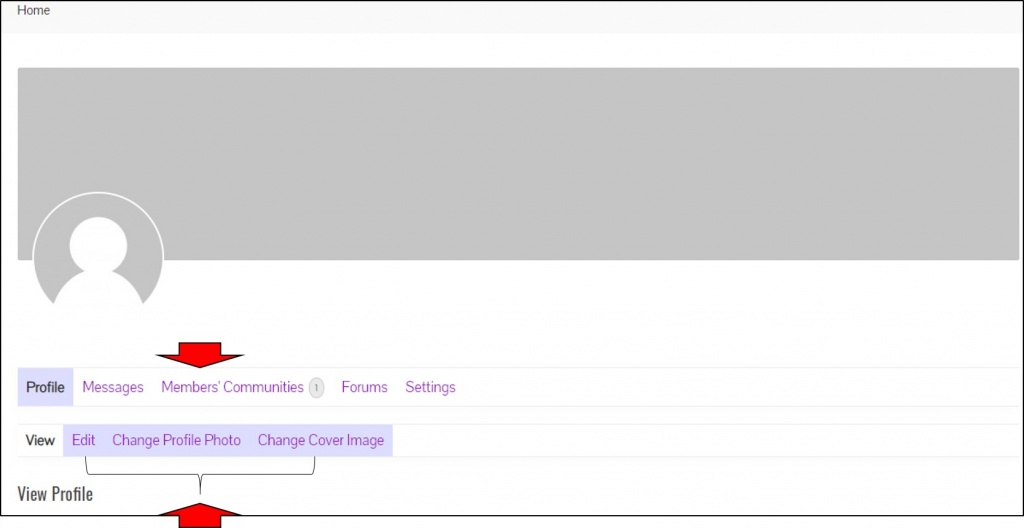
- Edit Profile
- Press My Profile
- Press Edit – to enter personal information
- Fill in the Full Name(required). Others are optional.
- Name will appear if the the registration is done by the student.
- Press Save Changes at the end of the page (left-hand-side)
| Save Changes |
-
- Change Profile (Photo)
- Press Change Profile (Photo)
- There are 2 options for inserting the photo
- Insert a photo from local drive
- Press Select your file
- Choose/press the file from the folder
- Insert a photo from local drive
Example:
-
- Crop the image – to get a proper image size
- Press Crop Image
-
- Taken from the webcam
- Press Take Photo
- Adjust your position
- Press Capture
- Press Save
- Taken from the webcam
3. Procedure 3: Participation in e-Forum
(a) Situation 1: student has been invited to the room
-
-
- Log in as usual to the Private Community page
- Find the name of the community to join. Example: Prof. Kumari Education Group community
- Press Accept Invitation – if the teacher has invited the student (for the first time only)
-
Example Situation 1
| Accept Invitation |
(b) Situation 2: Student is not invited but wish to join
-
-
-
- Log in as usual to the Private Community page
- Find the name of the community to join. Example: Prof. Kumari Education Group community
- Press Request Membership – (for the first time only)
- Wait for approval
- You can log out first and then log back in once your application is accepted
- If you’re still waiting – do a refresh / reload on your laptop or on your smartphone
-
-
Example Situation 2
4. Procedure 4: Participate in Activities & Interact with Group Members
The group community will be displayed after pressing the name of the group.
-
-
- Read the instruction carefully on the workspace
- Explore the content – example: Watch video clip or any other related links (contain learning materials)
- Response to the questions
-
| Press here to response |
| Play video clip |
| Read instruction |
Example:
5. Chat Room (chat)
-
- Chat room serves as a discussion board with friends before posted the answer to the forum
- Press Public Chat in the chat room to chat with all your friends
- Or press on a friend’s name to talk to the particular person only
A chat room allows files, images & links to be inserted
Student may send links of his work in a google doc or google slide presentation in the e-forum workspace
Example: Link to Folder (storage)
- Type of storage
- Google Classroom (Google Drive)
- Microsoft One Drive (need to sign in account –for the first time)
- Materials created in other offline application need to be uploaded to Google Drive or OneDrive
- Method
- Click on the relevant button (Example: Google Classroom page)
- Search for materials (kept in Google Drive)
- Copy file address (make sure it has shared permissions for all)
- Paste in forum space
- Press Submit
Example:
- From Google Classroom
-
- Click on the relevant button (Example: Go to the Google Classroom page)
- Search for materials (stuff stored in Google Drive)
- Copy link (make sure it has shared permissions for all)
- Paste in forum space
- Press Submit
-
- You can find materials with other links – Google image, Google Info, etc.
- You can record audio – save it to google drive or One Drive and then enter a link in the e-forum space
- You can do video recording – upload it to YouTube and then copy the link to the e-forum.
- There is much more that can be done with your creativity to create a strategy
- These PLC-CIDS Digital Learning features are constantly updated to improve their user experience.
- There are also limitations (restrictions) on this application.
- Overview of the E-Forum buttons
| Link to One Drive – to search the file and place the link in the forum |
| Link to Zoom – (subject to the terms and conditions) |
| Link to Google Meet (subject to the terms and conditions) |
| Link to Google Info – to find general info and place the link in the forum |
| Link to Google Imej – to search images and place the link in the forum |
| Link to YouTube – to search the Video Clip and place the link in the forum |
| Link to Google Classroom – to search the file and place the link in the forum
|
| Link to Google Drive – to search the file and place the link in the forum |
| This menu is temporarily unavailable for application |
| Students need basic ICT skills to use the application where most of them have been exposed through their own experiences & explorations. There are different methods/features on laptops and smartphones for executing the application.
|
OTHER OPTIONAL FEATURES
OPTIONAL FEATURE: Massages
Situation: On certain occasions, you would like to send messages.
Procedures:
- You must be on your profile site (Press My Profile)
- Press Messages
The features below are similar to E-mail.
- Press Inbox (to see messages)
- Press Sent (to see sent messages)
- Press Compose (to compose messages)